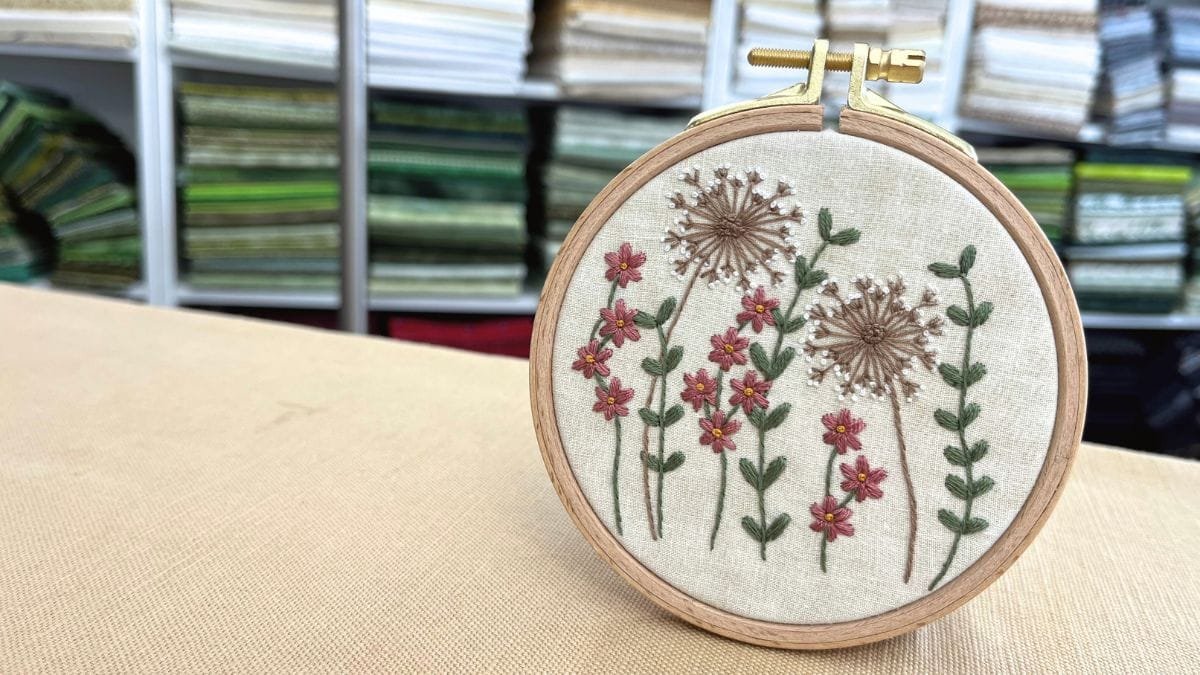
Welcome to my Whimsical Wildflowers hand embroidery video tutorial and free traceable PDF pattern. This is a beginner-friendly project using just four essential hand embroidery stitches and five DMC floss colors. It’s simple, fun, and perfect for anyone new to embroidery who wants a small beginner embroidery project.
The pattern is playful and the flowers are imaginative, so your flowers don’t have to be perfect—they’re endearing that way! Grab your hoop, floss, and needle, and stitch along with me. This project is about enjoying the process and learning at your own pace. I’m so glad you’re here to join this wildflowers hand embroidery journey and try out a fun, free hand embroidery tutorial.
Stitch Along With Me
Stitching these whimsical wildflowers is a lot of fun, especially for beginners. I designed this pattern to be simple so you can focus on learning the stitches without feeling overwhelmed. You can follow along with my video for stitch and color suggestions, or just use the PDF traceable pattern and create your own palette and textures.
Materials and Stitches for the Wildflowers Hand Embroidery Project
For my wildflowers, I used these DMC thread colors:
- 3363 – Pine Green Medium
- 783 – Topaz Medium
- 840 – Beige Brown Medium
- 223 – Shell Pink Light
- B5200 – Snow White
I used two strands for most stitches, except the white French knots, which I stitched with one strand. I love how delicate they look! This was my first time doing French knots with a single strand, and it turned out surprisingly well.
The pattern uses four beginner-friendly stitches:
- Fly Stitch – for the brown flowers
- Satin Stitch – to fill petals and leaves
- French Knot – adds small textured details
- Stem Stitch – for outlining stems
Why Feedback Matters
I really appreciate any thoughts about my videos. What works for you? What’s tricky? I take constructive feedback seriously—it helps me improve and learn. My main goal is mental health and enjoyment, not perfection. Every stitch counts, and sharing this wildflowers hand embroidery experience with you makes it more rewarding. Using a beginner embroidery project like this is a great way to practice without pressure.
Free Wildflowers Hand Embroidery Traceable Pattern
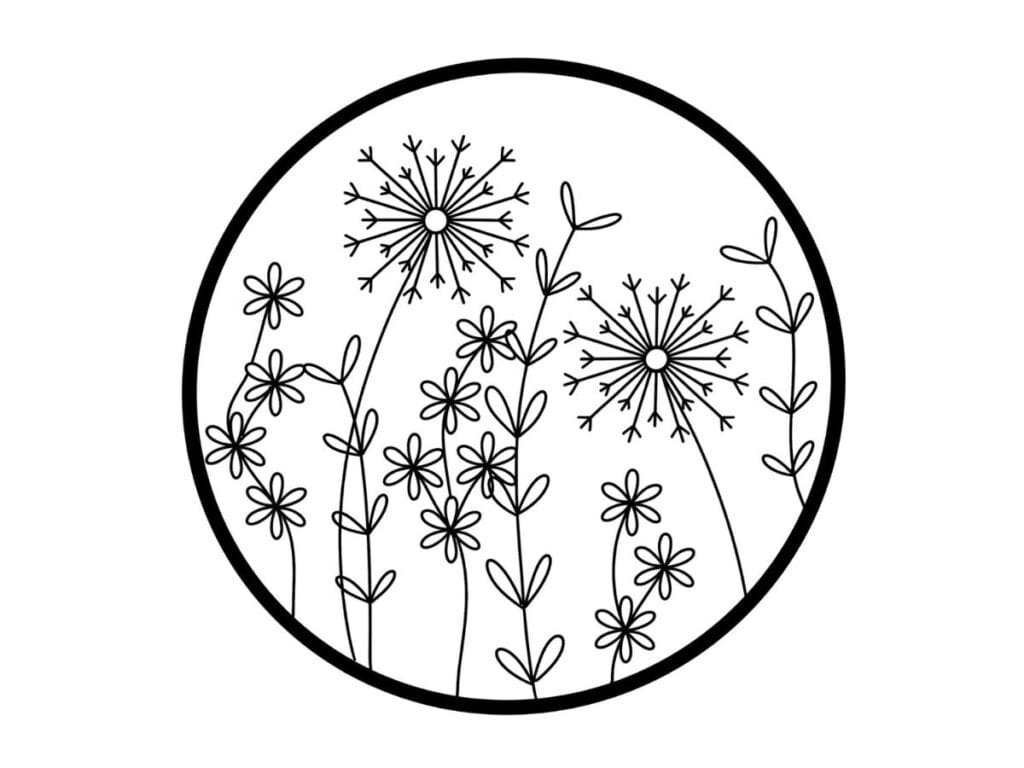
This design fits nicely in my 4-inch (95 mm x 110 mm) rectangular plastic Nurge hoop, though a round hoop works well too. You might want to use a 5- or 6-inch hoop to have enough room for stitching. If you want to display your finished work in a hoop, it looks nice in a 4-inch round hoop. Using a hoop is a simple, common way to display a project, and a free traceable pattern makes it easy for beginners ready to start working outside of kits.
Size and Scaling
The drawing measures about 3 1/2” x 3 1/2”, but feel free to scale it up or down. I like tracing patterns directly onto fabric with my iPad, which makes resizing easy. It’s great if you want larger stitches or a different hoop size.
You can stitch this design on a single layer of cotton or use two layers for more stability. Small stitches may feel fiddly or even difficult at first, but they create a delicate, beautiful look. Scaling the pattern larger is helpful if you struggle with eyesight. Either way, this wildflowers hand embroidery project is rewarding and fun.
Close-Up Photo of Wildflowers Hand Embroidery
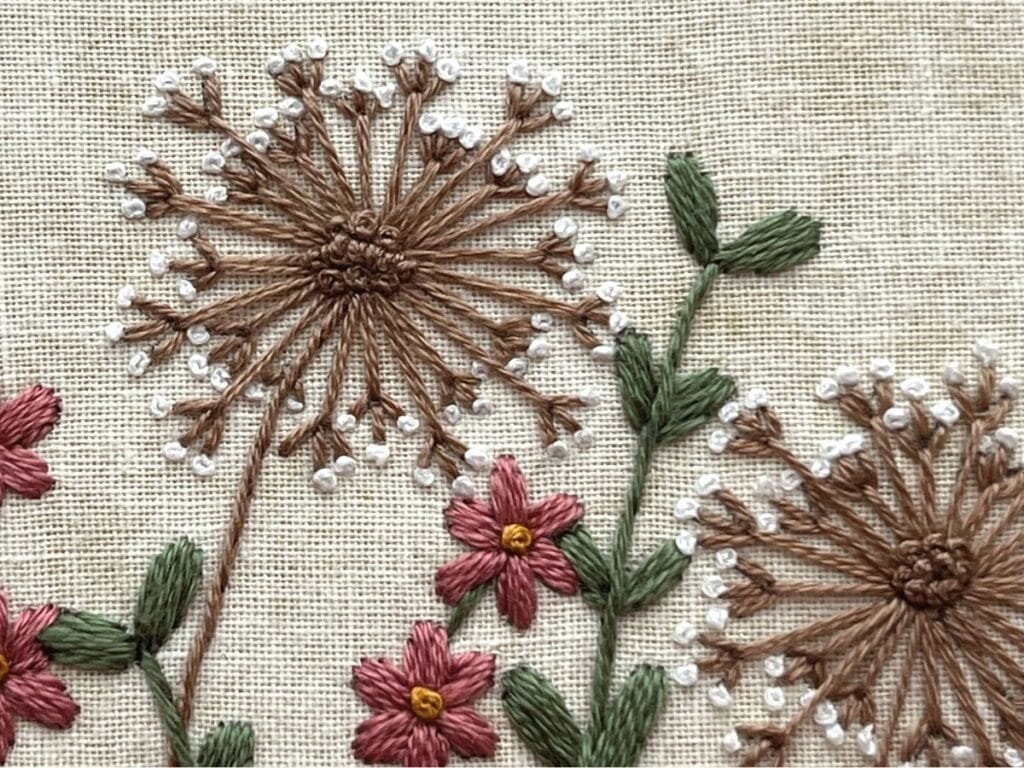
Taking a closer look, I noticed I forgot one white French knot—but that’s okay! It’s easy to fix later, and mistakes are just part of the journey.
Fabric and Technique
I usually use two layers of cotton quilting fabric, which hold the stitches well. The small stitches are simple but satisfying to see come together.
If you prefer larger stitches, you can scale up the pattern. The main goal is to enjoy the process and feel proud of your efforts. Watching your wildflowers hand embroidery grow is motivating, and following this hand embroidery tutorial helps you notice improvement with every stitch.
My Happy Space, Complete With My Wildflowers Hand Embroidery in My New Nurge Stand
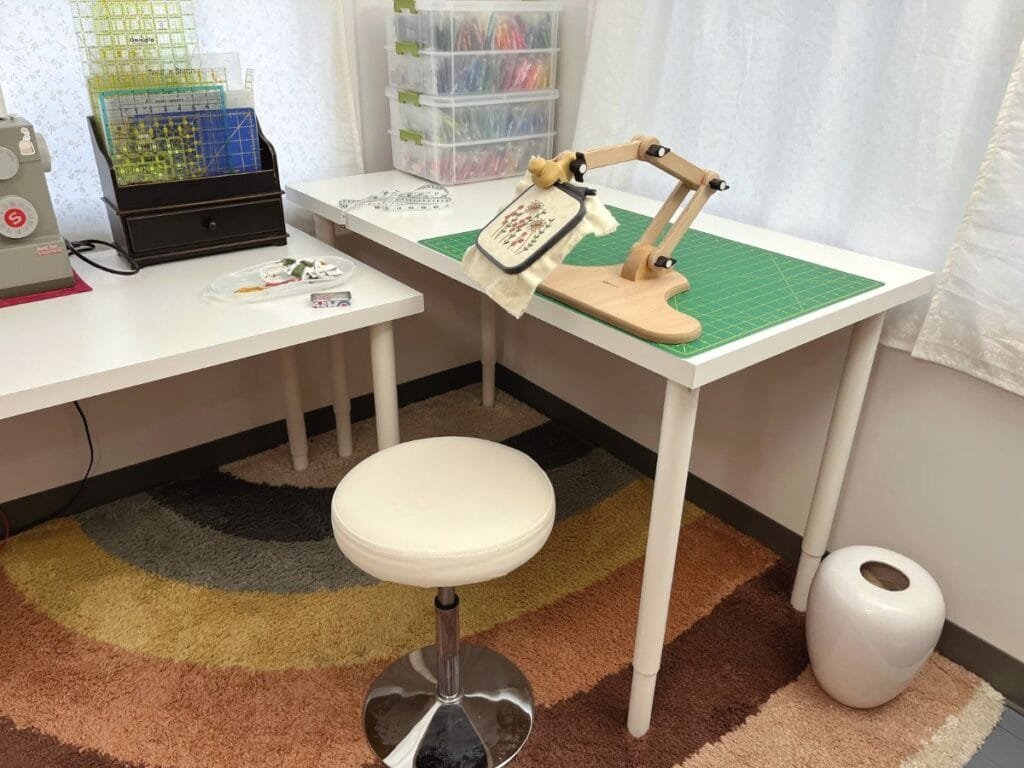
I have my studio set up in a sunroom, which is just the right size for all my essentials. This is where I usually record my YouTube videos. I originally planned the basement, but the sunroom worked better—it has lots of natural light, which makes stitching easier and more enjoyable.
Why I Love My Setup
I spend most of my time here in the winter, though in nice weather, I’m outdoors with my chickens or fishing with my husband. I’m especially thrilled about my new Nurge embroidery stand, which holds my rectangular hoop perfectly. It makes stitching longer projects much easier and more comfortable. A well-lit, dedicated space with a good stand really improves your hand embroidery experience and makes any beginner embroidery project more fun.
I Don’t Know How I Went So Long Without an Embroidery Stand
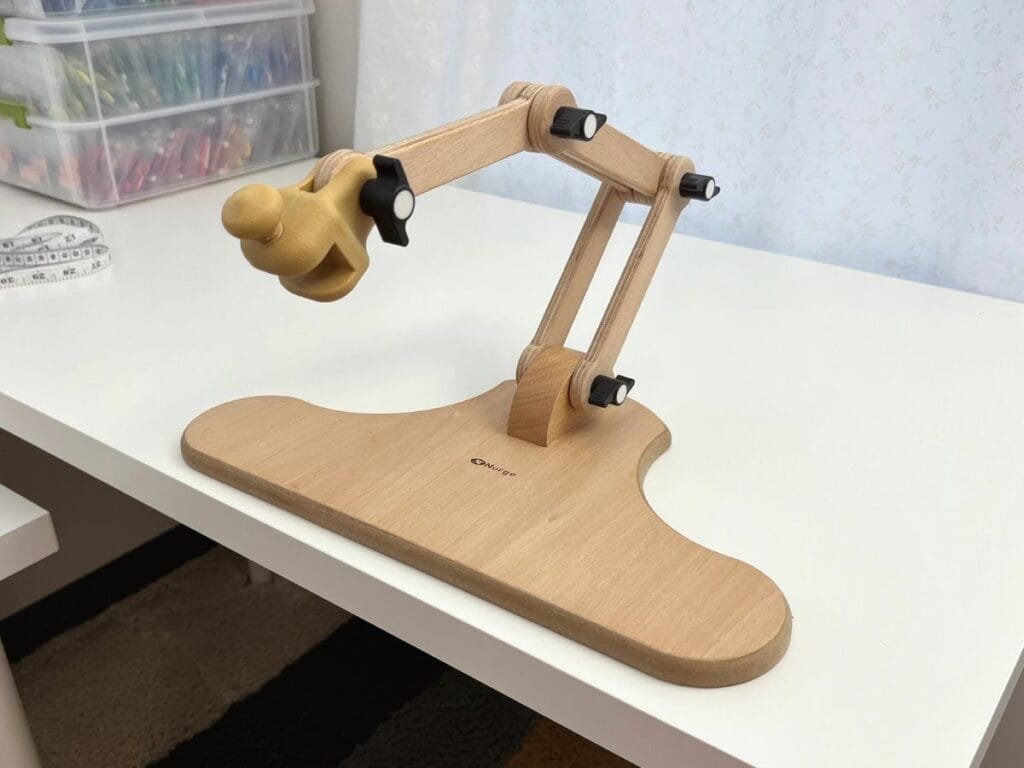
This Nurge stand 190-4 is available for purchase on Amazon. I may earn a small commission from qualifying purchases made through this link.
Before using a stand, holding my hoop for long projects was tiring, and my upside-down stool setup with a clamp was not adjustable. Now, the Nurge stand keeps the hoop steady, freeing my hands to focus on stitching and keeping my body aligned properly.
Featured on My Supplies Page
This stand is currently featured on my stitching supplies page, where I list my favorite embroidery products. It’s a simple addition that makes a big difference, comfort and stability really matter. I highly recommend trying a stand—it really changes the stitching experience and makes any beginner embroidery project easier to enjoy.