This free beginner wildflower embroidery pattern comes as a PDF and includes a YouTube video tutorial that shows every stitch used in the design. The video lists how many strands of embroidery floss I used along with the DMC color numbers, so you can follow along easily. This pattern is completely free to download and use however you like. Making it accessible feels important to me. Embroidery can be a calming, grounding activity, and removing barriers helps more people feel comfortable trying it. This project is designed to be supportive and low-pressure, whether you’re new to hand embroidery or looking for a relaxing creative project.
How I Created the Wildflower Embroidery Video Tutorial
I recorded over two hours of footage while creating this embroidery tutorial and edited it down to about ten minutes. The goal was to keep the video clear, focused, and easy to follow without overwhelming you. Editing removed distractions and highlighted the essential steps for each stitch. Short, intentional instruction is easier to manage, especially when attention or energy is limited. This tutorial respects your time while giving you the guidance needed to complete the pattern confidently.
Beginner-Friendly Wildflower Embroidery Pattern PDF and Hoop Size
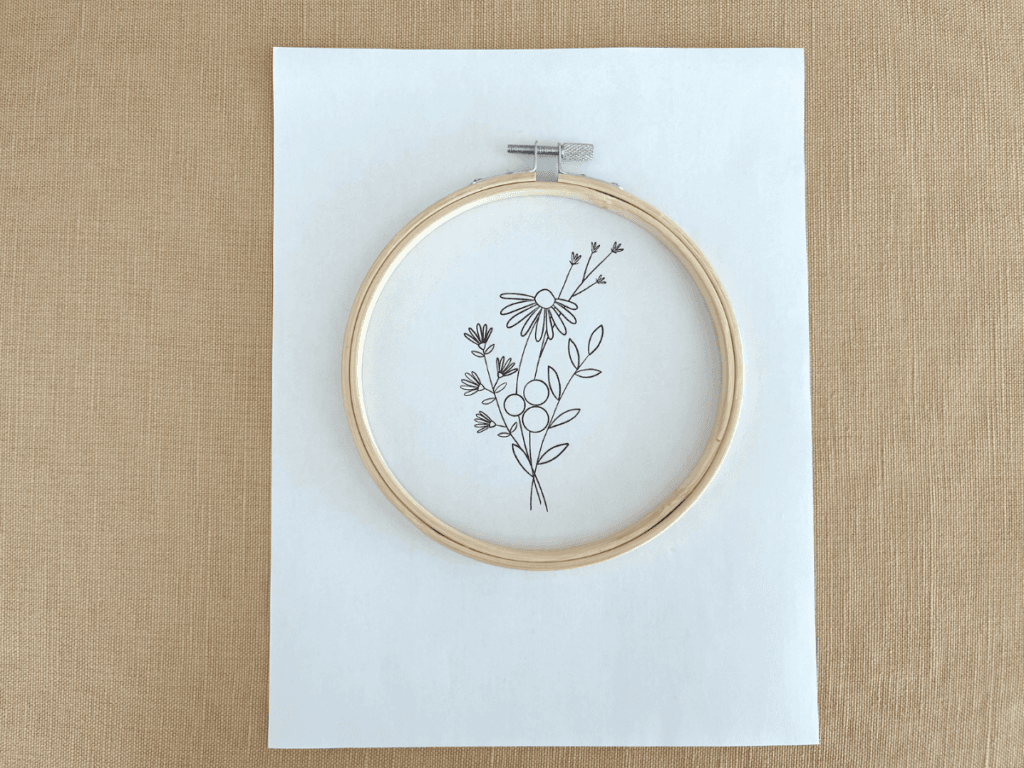
This pattern fits a 5½-inch hoop and works especially well on white fabric, which makes tracing the design simple. I used 100% cotton quilting fabric because it’s stable, easy to handle, and widely available. These choices make the project beginner-friendly and less intimidating. When your setup is simple, you can focus on the stitching rather than worrying about mistakes. You don’t need special supplies or advanced skills to start. This pattern is meant to be approachable and manageable, offering a comfortable entry point into hand embroidery.
Tracing Your Wildflower Embroidery Pattern With Frixion Pens
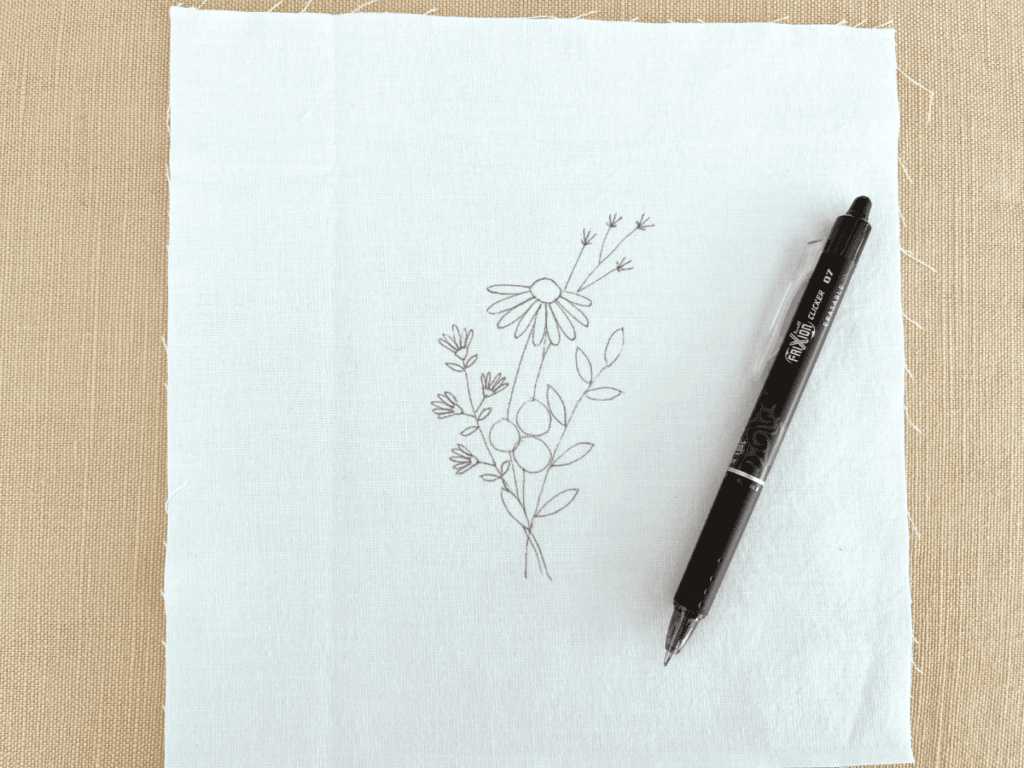
I like to trace my embroidery patterns using Frixion erasable pens because the ink disappears with heat from an iron. This reduces worry about permanent marks showing through later. Using erasable tools allows flexibility, which can be reassuring when you’re learning. Knowing that lines can be removed makes it easier to experiment and adjust. While results can vary depending on fabric, Frixion pens are a helpful option to keep the tracing stage low-pressure and forgiving.
DMC Floss Colors Used in This Wildflower Embroidery Pattern
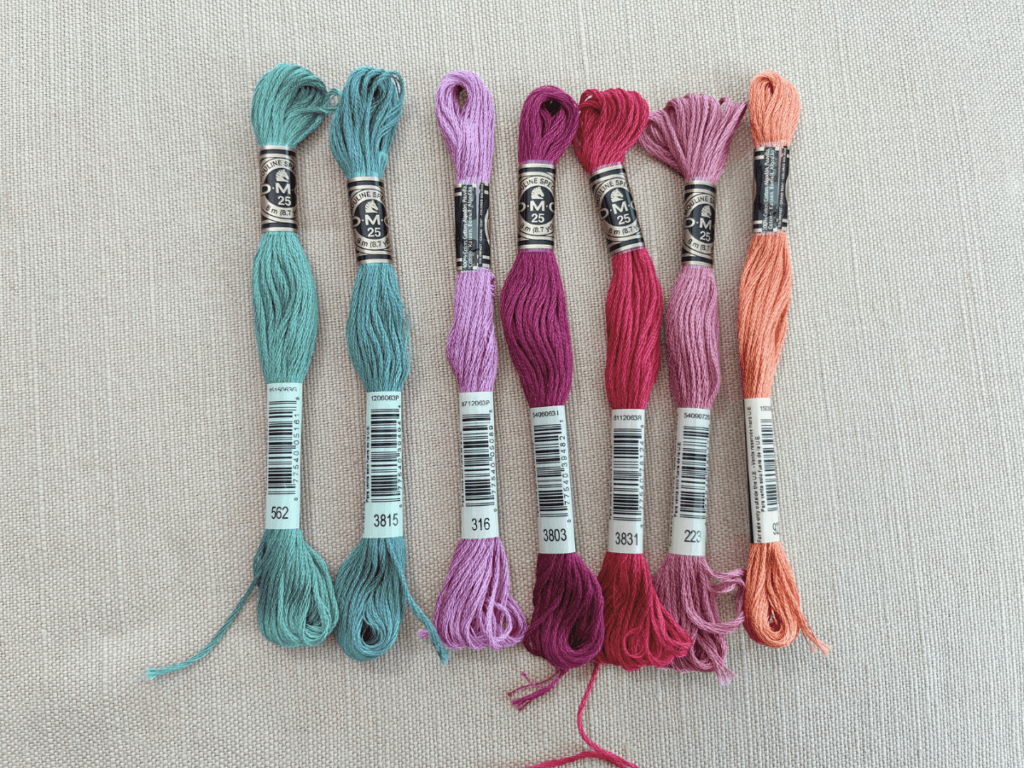
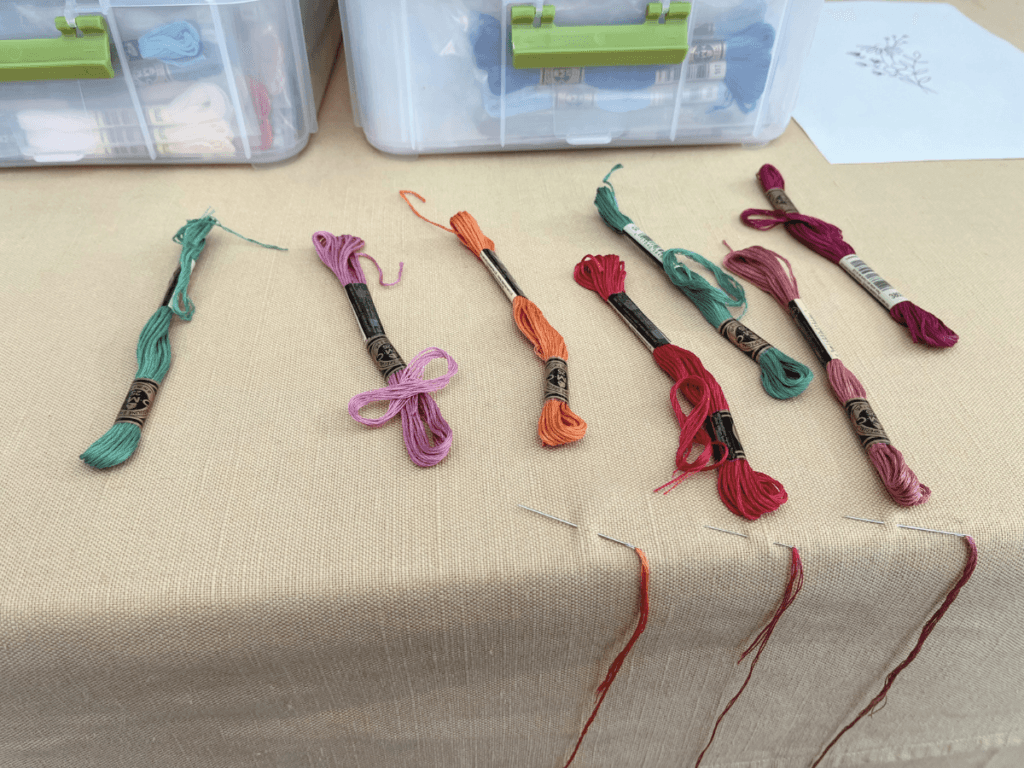
The DMC embroidery floss colors I used are 562, 3815, 316, 3803, 3831, 223, and 922. These colors worked well, but feel free to change them if you prefer. I used five different stitch variations, though there’s no requirement to match exactly. Embroidery allows for personal choice. Adjusting colors or stitches can make the project more your own. This pattern is meant to support creativity rather than limit it, giving you space to make it work for your preferences.
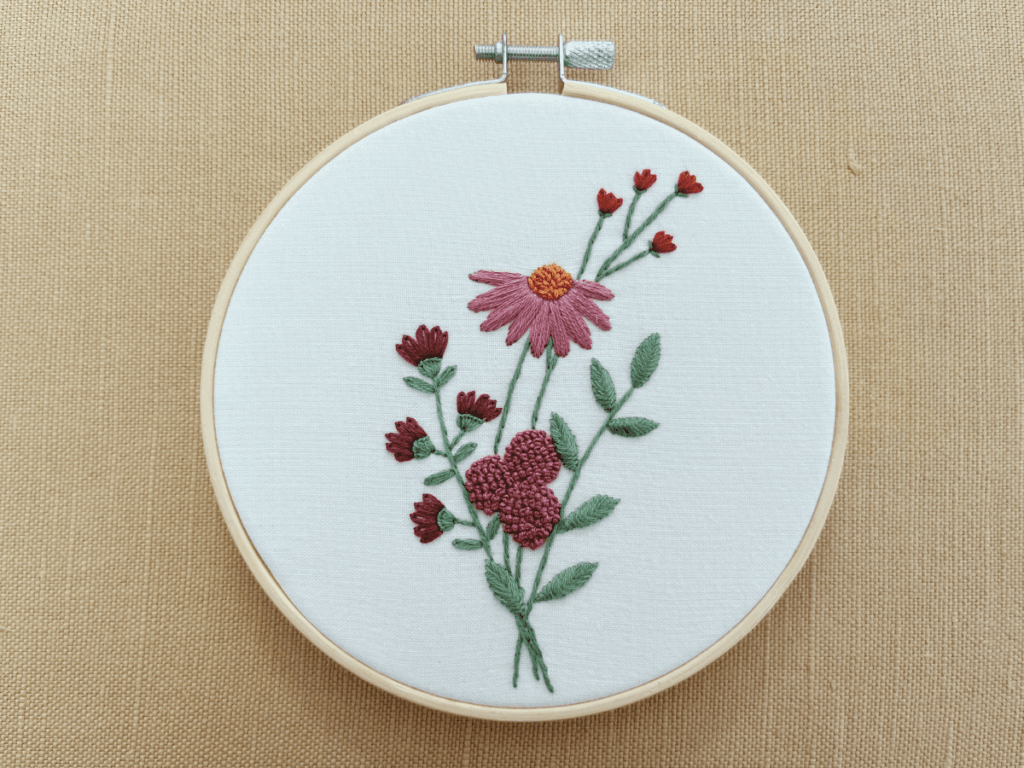
Using Lazy Daisy and Buttonhole Satin Stitches in Wildflower Embroidery
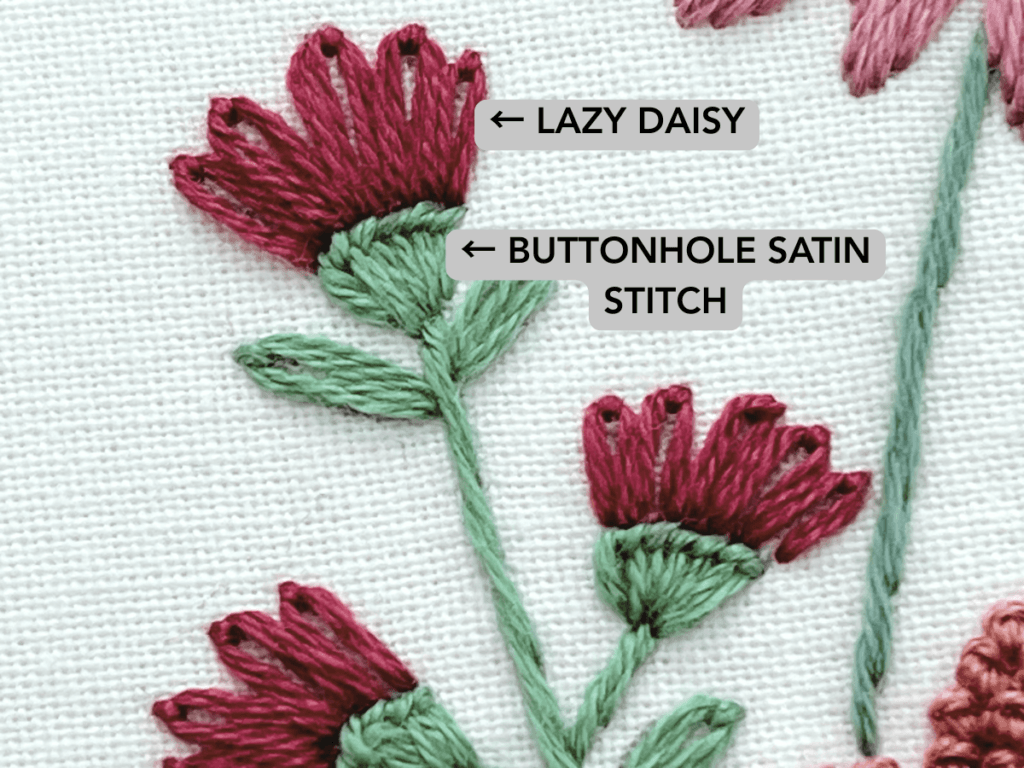
Lazy daisy is a fast and enjoyable stitch that works well for petals and leaves, helping the project move along smoothly. I also used buttonhole satin stitch for the flower receptacle, where the petals attach. Combining quicker stitches with more detailed areas creates a natural rhythm while stitching. This balance makes the process engaging without feeling overwhelming or rushed. Choosing stitches you enjoy keeps embroidery relaxing and fun.
Raised Herringbone Stitch for Leaves and Stem Stitch for Stems
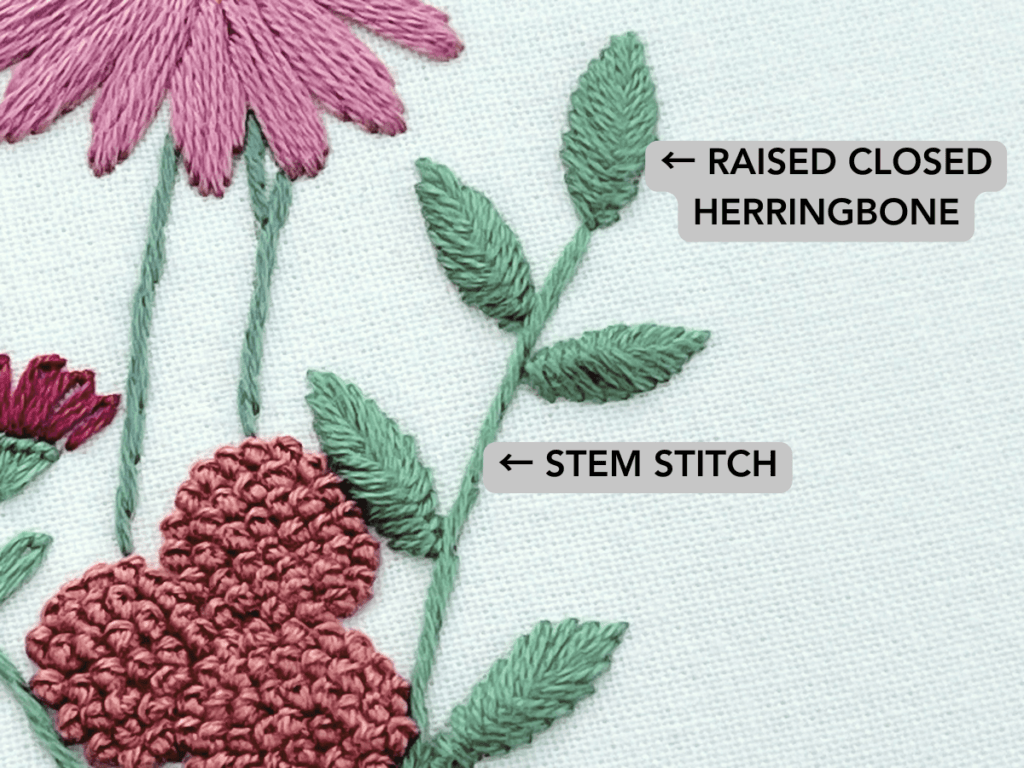
For the larger leaves, I used a raised closed herringbone stitch and loved how puffy and dimensional it looked. The added texture gives the design more depth and interest. For all stems, I used a basic stem stitch to keep things consistent. Mixing simple stitches with dimensional ones adds variety without making the project complicated. Trying a new stitch in a small area helps build confidence while keeping the overall pattern approachable.
French Knot Fill for Budding Flowers in Your Wildflower Pattern
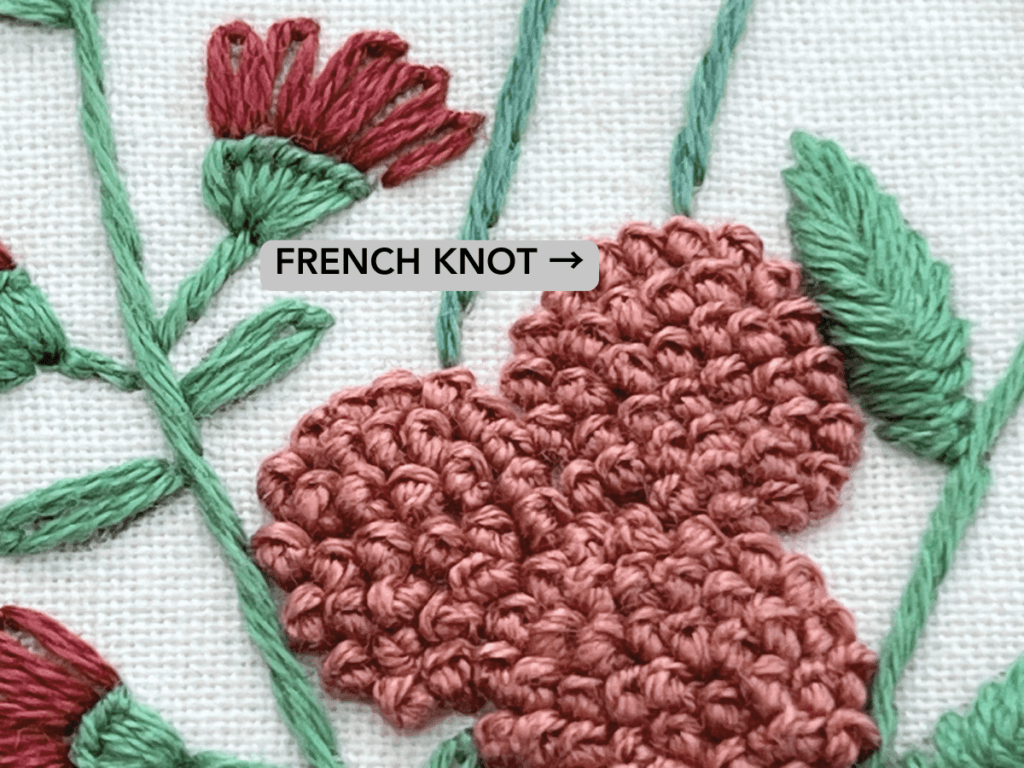
I used a solid fill of French knots for the round budding flowers. This stitch works well for creating small, textured shapes that feel full. Repeating the same motion can feel steady and grounding, especially during longer stitching sessions. Each knot contributes to the final shape, even if progress seems slow at first. Taking your time with the buds lets them build gradually without pressure to rush.
Seed Stitch for Echinacea Centers and Satin Stitch Petals
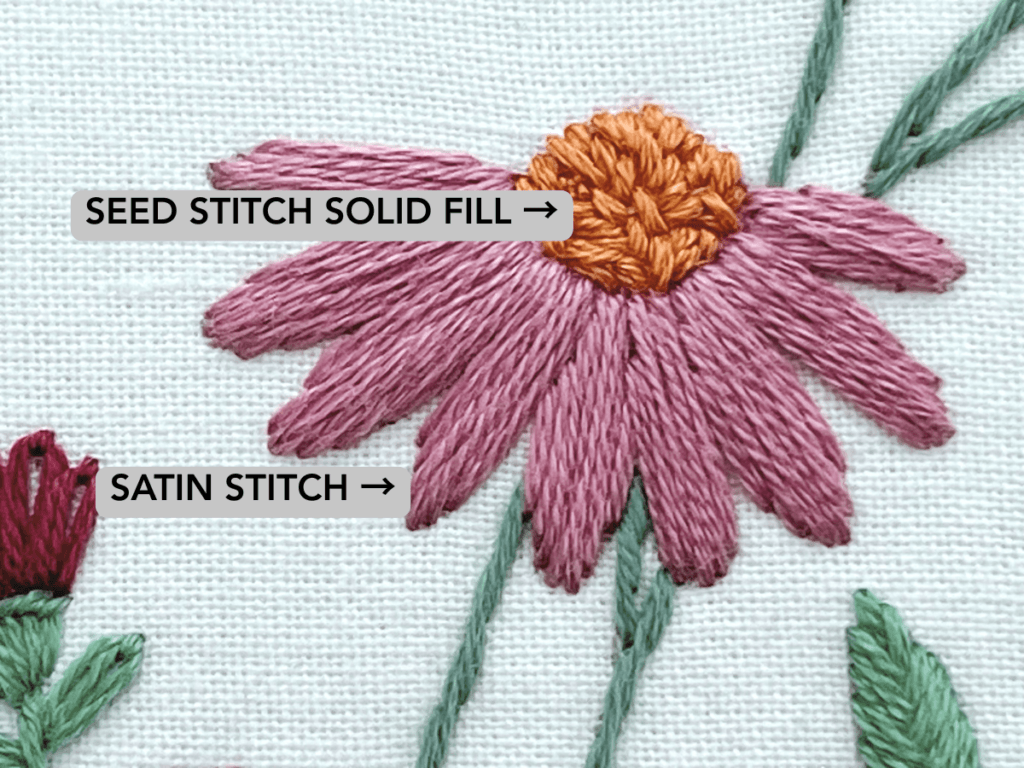
For the echinacea disk florets, I used a seed stitch solid fill instead of French knots. This added texture without extra bulk. For the petals, I used satin stitch to keep the shapes clean and defined. Trying different stitch combinations helps expand your comfort level while staying within a manageable pattern. This allows you to explore new techniques without feeling overwhelmed.
Learning and Practicing With This Beginner Wildflower Embroidery Pattern
While I’m still learning to take embroidery to the next level, I believe this free beginner wildflower embroidery pattern and video tutorial can be genuinely helpful for your own hand embroidery journey. The project focuses on practice and exploration rather than perfection. Sharing what I’m learning keeps embroidery approachable and realistic. If this pattern helps you build confidence, stay curious, or enjoy a calm creative moment, it has done its job.