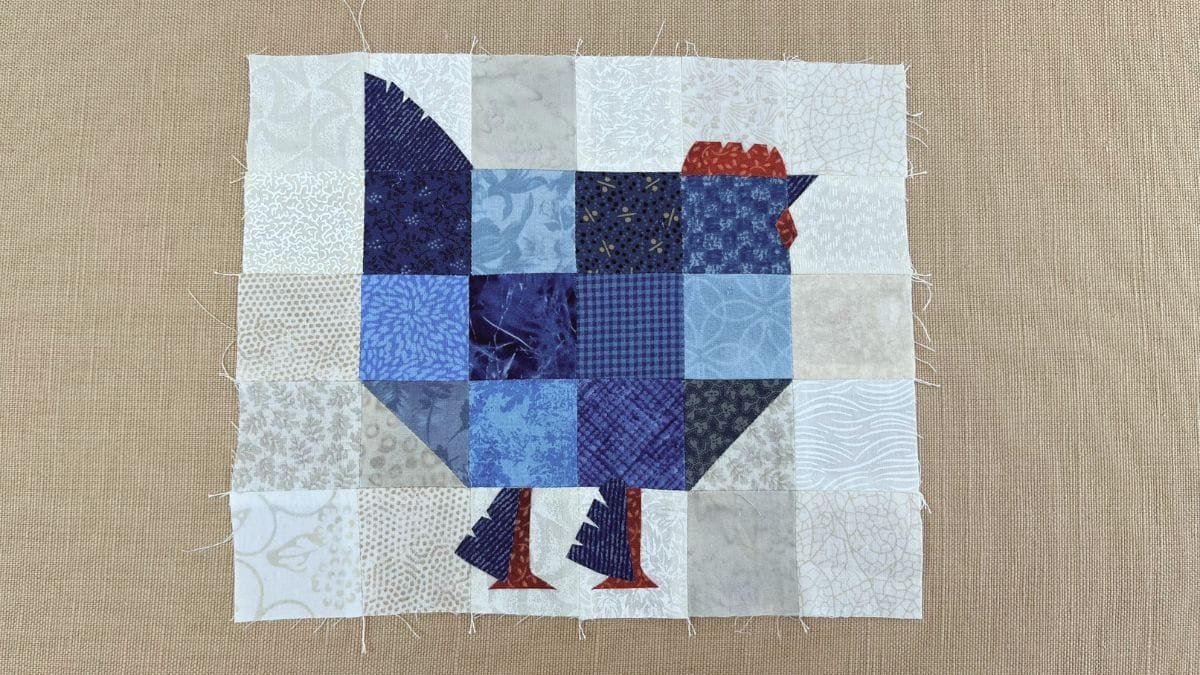
This chicken quilt block came together by combining appliqué to create detailed shapes and texture. When I filmed the video on how to sew a chicken quilt block, I was thinking about how many ways there are to cut and attach shapes. There isn’t a single correct approach. Each block becomes its own piece through fabric choices, scale, and detail.
As I designed the elements, I stayed focused on what was happening in the moment rather than where the block would end up. Each section required a slightly different kind of attention. Most of the ideas came to me quickly, though that isn’t always the case, and that felt important to acknowledge too.
This post follows that same rhythm. It moves through the parts of the block as they developed, offering context for what appears in the tutorial.
Filming While Making
The video documents how to sew a chicken quilt block as I made this version. The camera followed the work rather than directing it. I filmed mainly while cutting, sketching, and adhering the appliqué details, allowing the process to remain mostly uninterrupted.
Because I had already made the block once before, I wasn’t encountering choices for the first time. That familiarity let me stay present with the materials instead of anticipating each step.
This post sits alongside the video and reflects that experience—moving through the pattern again while noticing where my hands led me and my thoughts guided me.
The 2-Inch Square Layout

The chicken’s body and background are built from 2-inch squares with a few simple triangles. In the photo, the pieces are laid out and ready to be chain pieced.
Working on a small scale helps me keep my focus. Each square has its purpose and its place. The repetition establishes a steady rhythm that carries through the block.
As I arranged the layout, I let variations in cream and blue guide the choices. There was no need to think far ahead. The larger image formed gradually, one piece at a time.
Developing the Tail
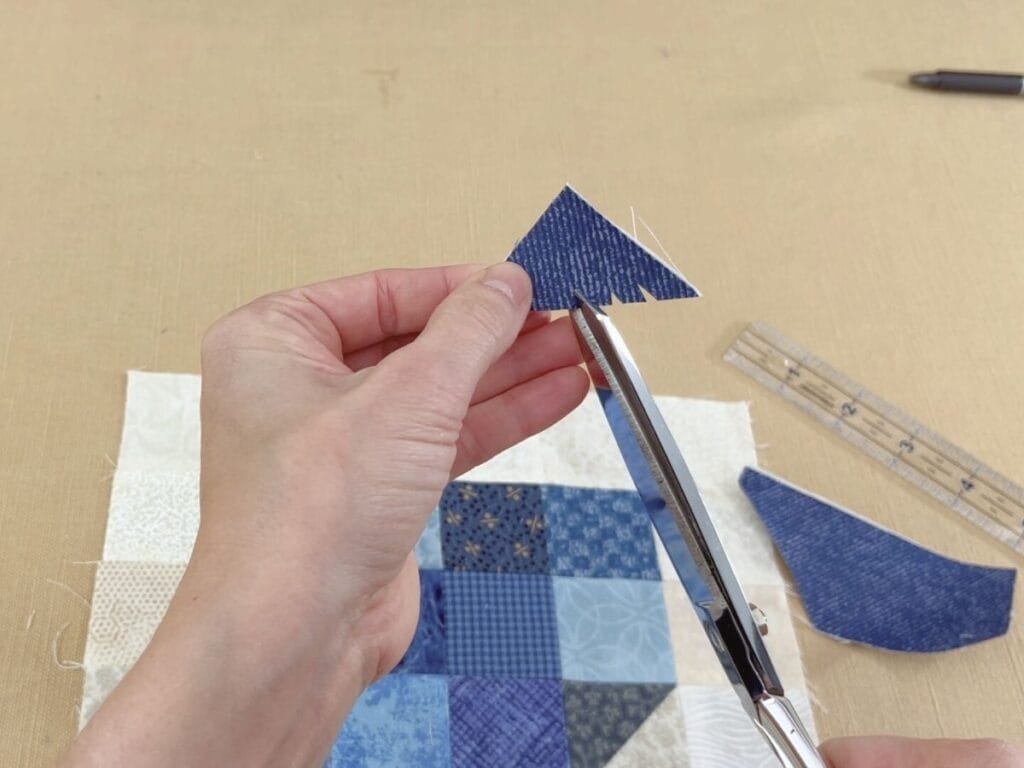
The tail allowed room for variation. I shaped it as I worked, responding to fabric choices and overall balance within the block.
This part of the process stayed open. I made small adjustments, stepped back, and returned to it again. In this case, my decisions came quickly, though that isn’t always how it unfolds.
The finished tail reflects that time spent considering shape and placement without forcing a final solution too early.
Sketching the Legs and Feet
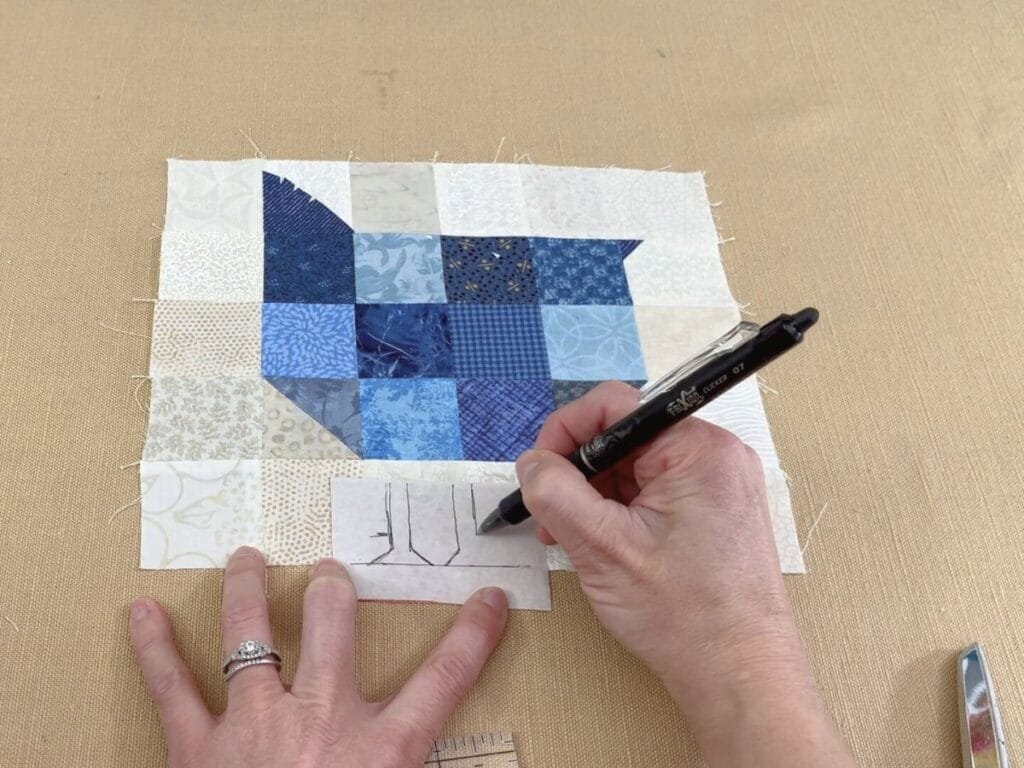
Before cutting fabric for the legs and feet, I sketched basic shapes directly onto the paper backing of the adhesive. Drawing at this stage gave me room to revise if needed.
The sketch stayed simple and flexible. I felt clear about the concept, and it provided enough direction for the next step.
That brief pause allowed space to look, adjust, and then move forward with confidence.
Feathered Details From Familiar Chickens
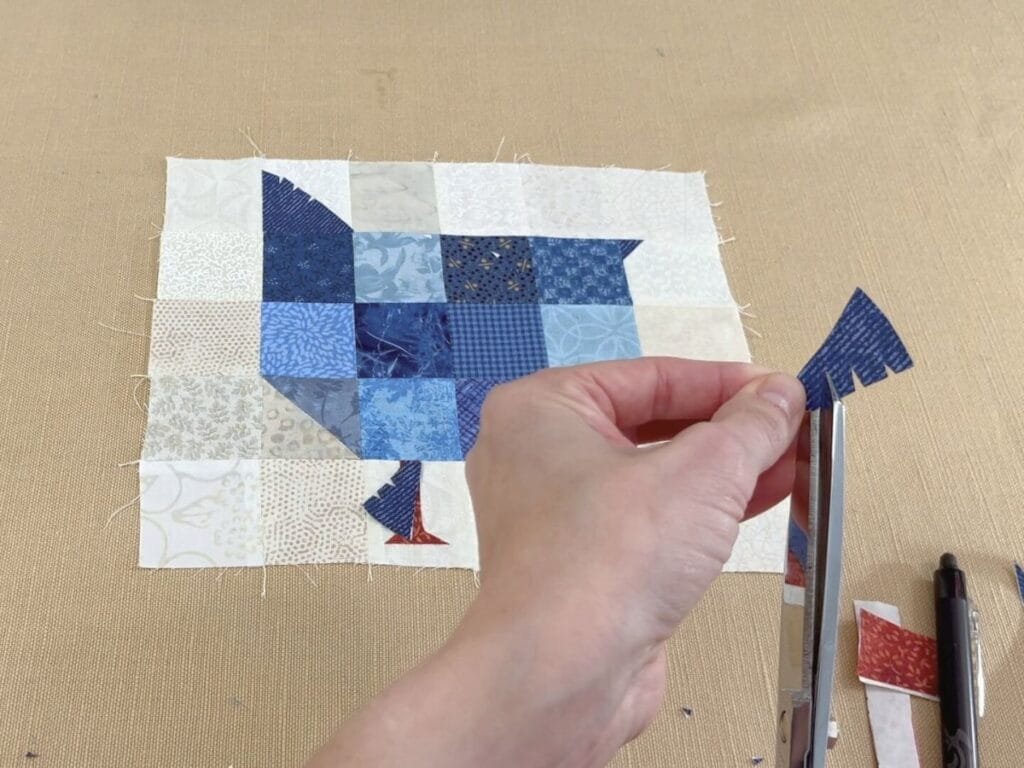
The feathered legs and feet reference my Dark Brahma chickens. Their feathered feet are something I notice often, and that detail naturally found its way into the block.
As I worked on the feathers, I realized I was approaching them in a similar way to the tail. The shapes and textures relate to each other visually.
Including this detail tied the design together and rooted it in observation rather than planning.
Positioning the Comb
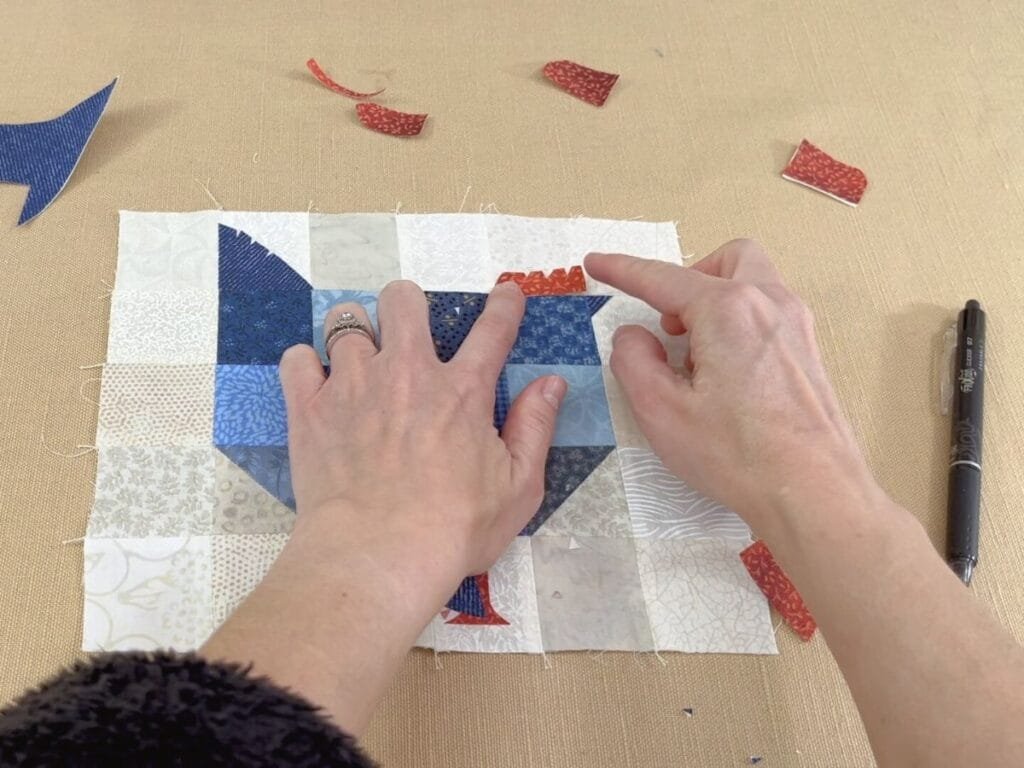
When lining up the comb for the final cut, I worked mostly freehand, using a pen only for a small reference point.
I adjusted the placement until it settled visually, then made the cut. Once the shape was defined, the process moved forward without hesitation.
This step reflects a quiet moment of focus that sits between larger sections of the work.
Sketching the Wattle
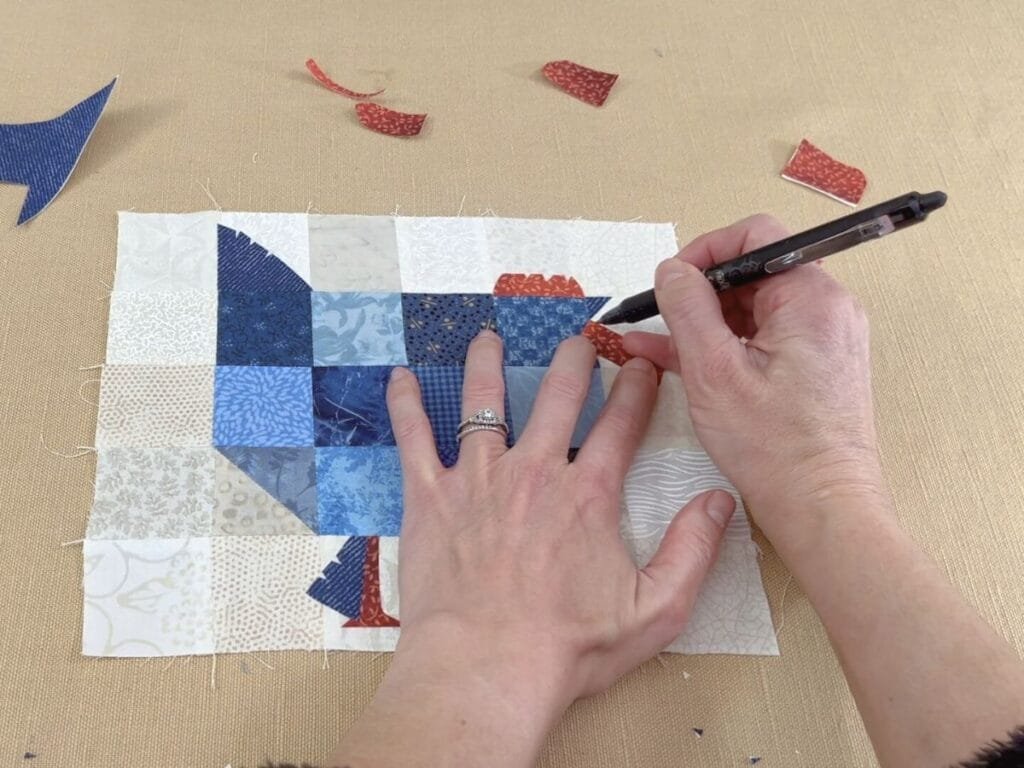
The wattle began as a light sketch drawn directly onto the fabric.
Working this way kept the process fluid. I adjusted the shape quickly and without pressure, allowing it to develop naturally.
Once the placement felt settled, I followed through and set the adhesive with the iron.
Slow Stitching the Pillow Sham
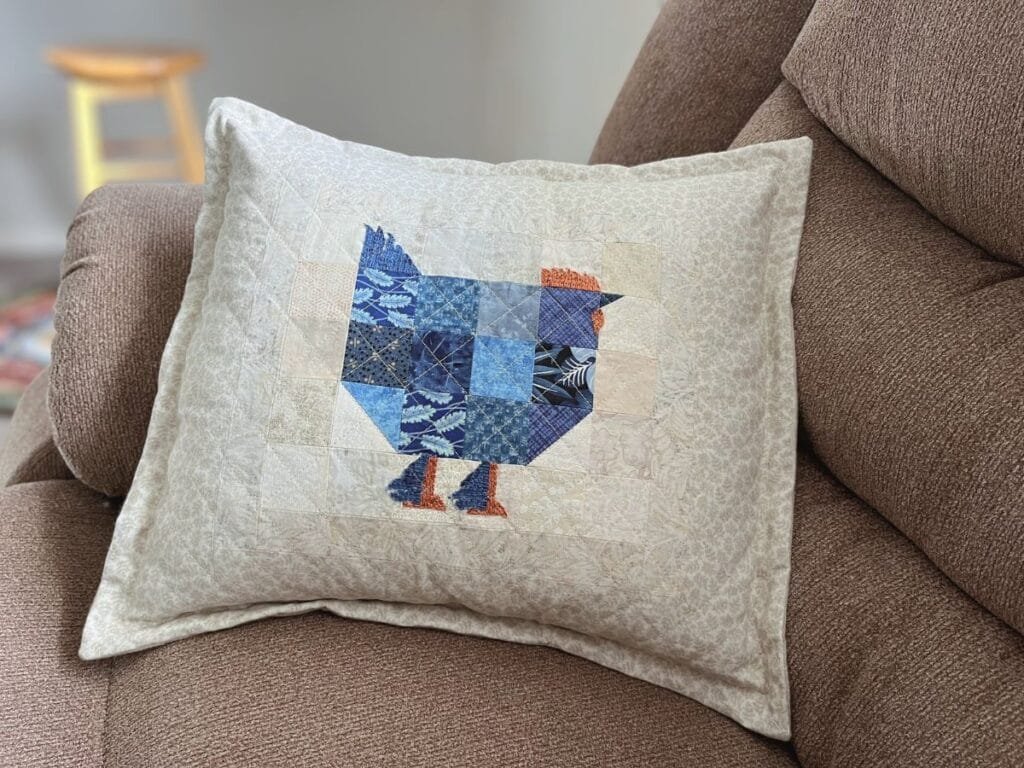
The chicken quilt block shown on the pillow sham was the first project I made from this pattern.
This earlier block includes slow stitching with embroidery floss. Spending time with those stitches influenced how I approached the later version, even though the video focuses more on cutting and adhering appliqué.
The pillow sham holds the beginning of the pattern’s story. The block in the video grows out of that initial work, sharing the same structure while moving in an ever so slightly different direction.
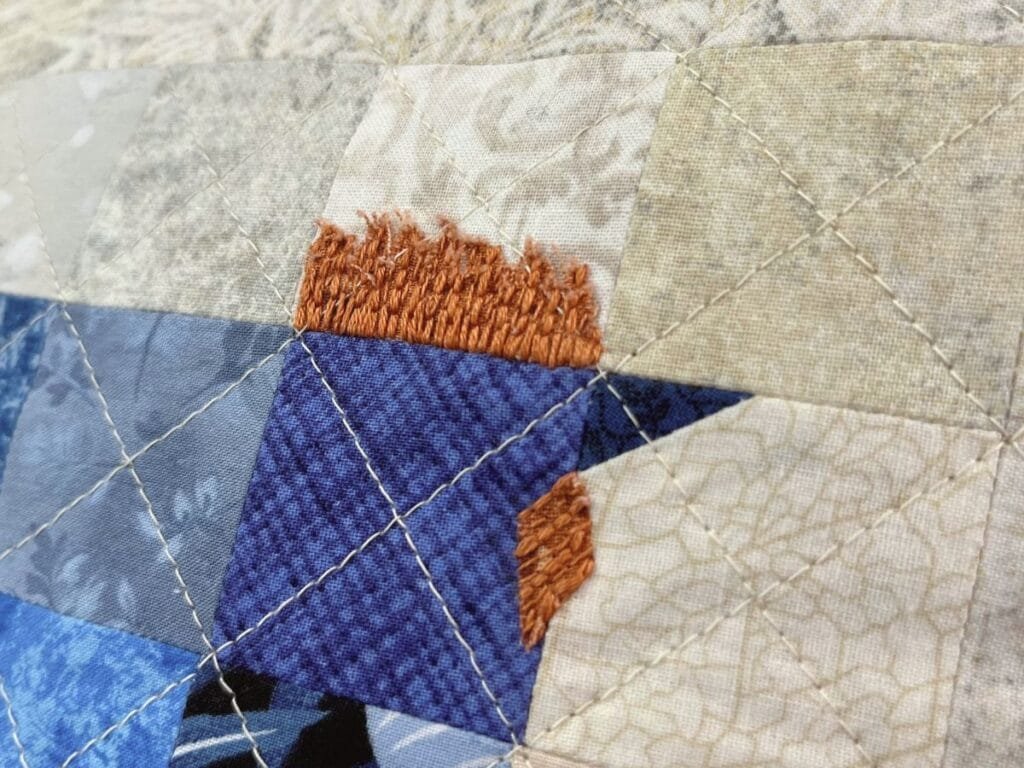
Stitching Details on the Tail
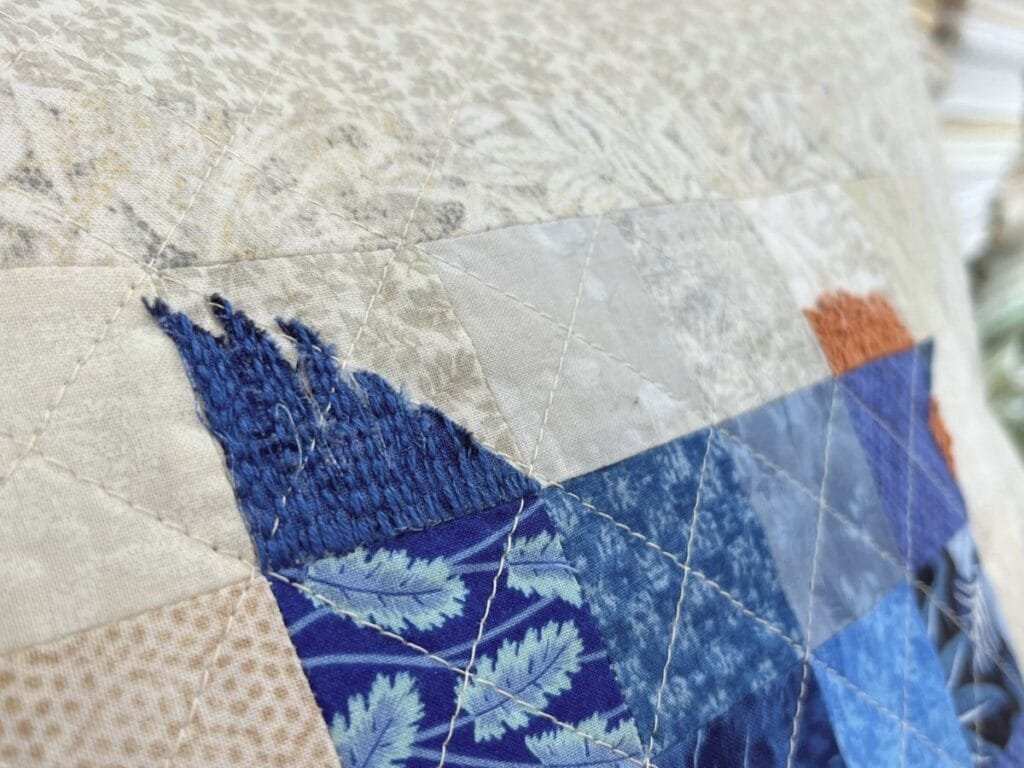
The stitching on the tail follows the movement of the fabric. The stitches shift slightly as texture guides the direction.
This part of the work unfolded gradually. Each stitch responded to the one before it without aiming for uniformity.
The finished detail holds that quiet progression, marking a personal moment within the project.
Stitching the Wattle
The wattle stitching traces a small, contained area. The scale required steady focus and close attention.
As I stitched, the shape guided the needle rather than the other way around. The process stayed quiet and deliberate.
This detail doesn’t stand out immediately. It reveals itself through closer looking, carrying the memory of that focused time.
Stitching the Legs and Feet
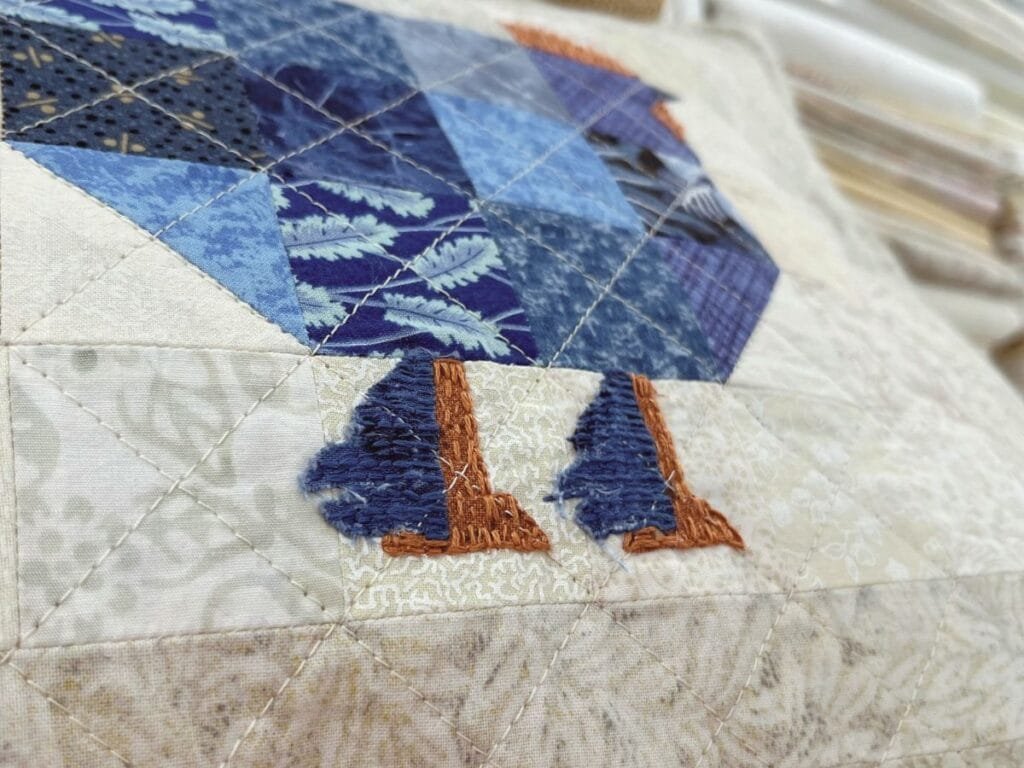
The final stitching on the legs and feet visually grounds the block. These stitches anchor the chicken to the surface.
As this section came together, the project reached a natural pause. The block held everything that came before it—piecing, sketching, appliqué, and stitch work.
The finished piece reflects the attention given throughout the process, held in fabric and thread.